How to Purchase Multiple Seats and Manage Your Group
Step 1: Go to the product page
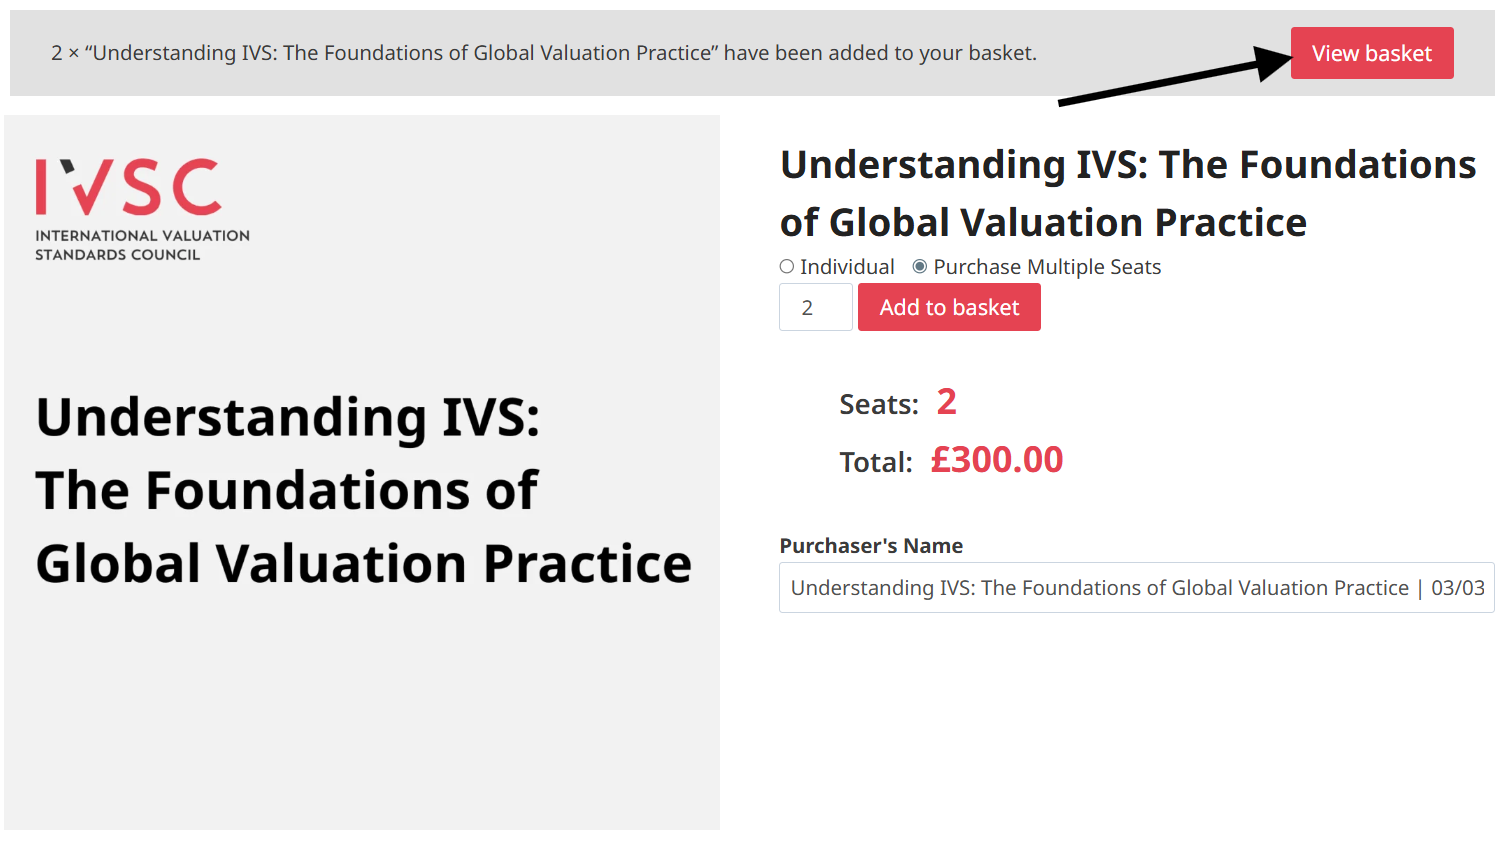
You’ll see two options: Individual and Purchase Multiple Seats. Select Group to proceed with a multi-seat purchase. The Individual option only enrolls one person and does not allow quantity changes.

Step 2: Set the number of seats
After selecting Group, a quantity field appears. This number represents the total seats available — meaning how many members you can add to the group. Enter your desired seat count, and the price will update automatically.
Note: If you purchase, for example, 10 seats, 1 seat will be assigned to you, so the remaining 9 seats can be distributed to other members.

Step 3: Purchaser’s Name or Name Your Group
If Autofill Group Names is enabled, a name may be pre-filled — you can keep it or change it.

Step 4: Add to cart and complete checkout
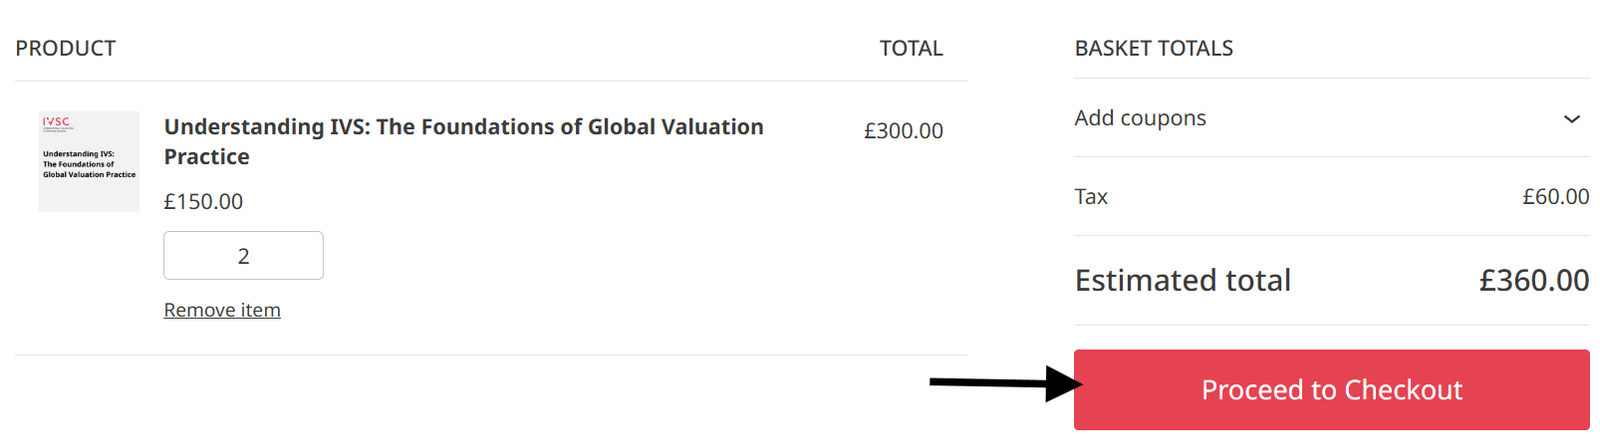
Click Add to Cart. A View Basket button will appear to go to the Cart page to review your order. Then click the Proceed to Checkout button to continue to the Checkout page and complete your purchase.
Step 5: Checkout and account creation
On the Checkout page, you will create an account, or if your email address is already registered, you will be asked to log in. The only required fields are:
- Email Address
- Password
- First Name and Last Name
- Town/City
- Payment Method
- The following checkboxes:
- (Required) I confirm that I am at least 18 years of age and have read and agree to the Terms and Conditions and Privacy Policy.
- (Required) I request immediate access to the digital course and understand that once access begins, my statutory cancellation right (where applicable) will no longer apply. This does not affect any refund rights expressly provided in the Terms and Conditions.
Once all the required fields are filled and the payment method is valid, click the Place Order button.
After the order is successful, your group is created automatically, and you are assigned as the Group Leader to manage the multiple seats you purchased.

Step 6: Access your group and account
After a successful purchase, you’ll be redirected to the Order Received page. From there, you can:
- You can also click the Visit My Account button to manage your account and access the enroled course.
- Click the Visit Groups Dashboard button to manage your group.
- Or visit the Groups Dashboard under My Account > Groups Dashboard in the site navigation menu.
Step 7: Review your group overview
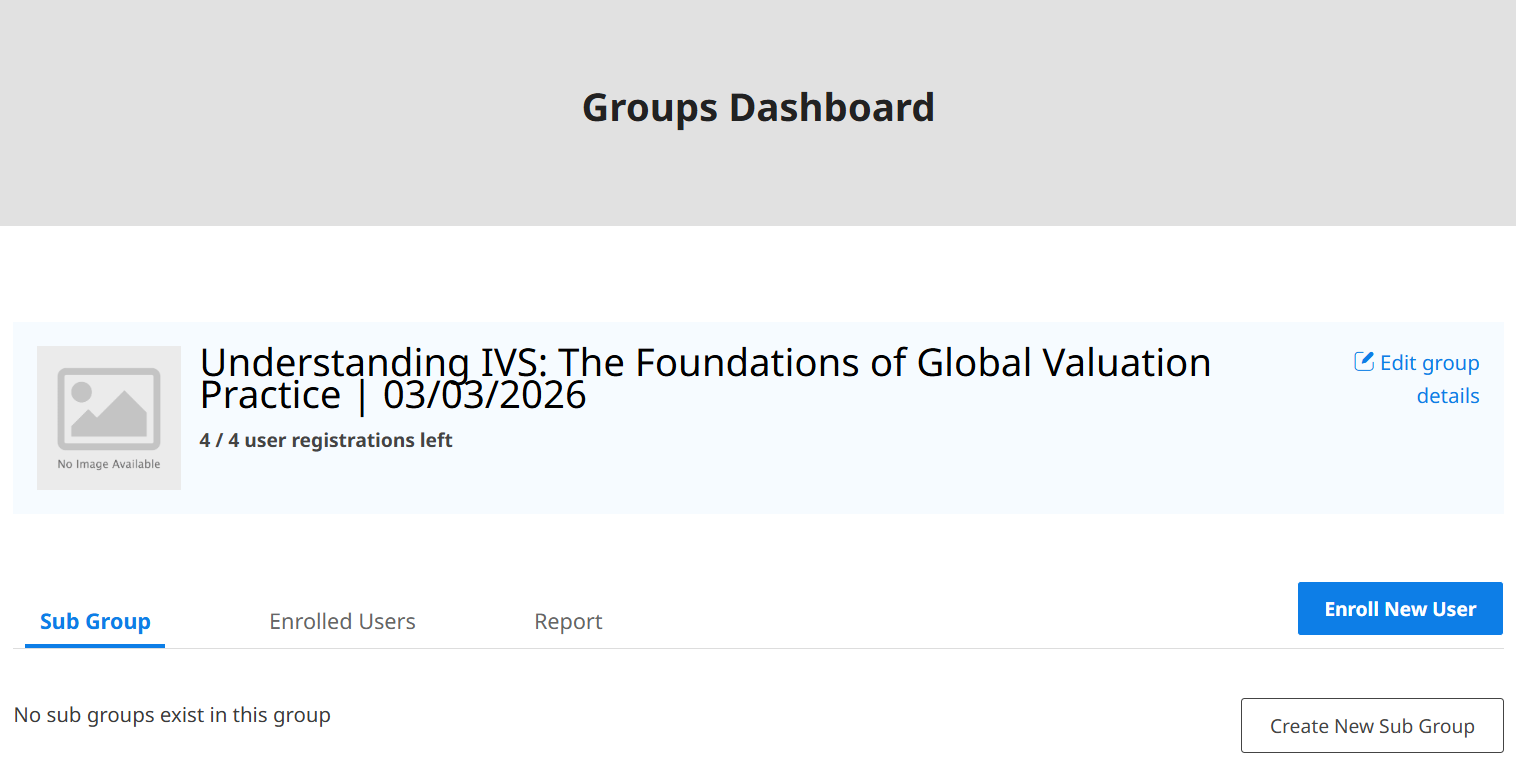
The dashboard shows your group name, the total number of seats purchased, how many seats are currently in use, and reporting details. If you purchased multiple groups of the same product, each group will appear as a separate entry and can be managed independently.
Step 8: Add members to your group
Inside your group dashboard, click the Enroll New Users button. You have two methods:
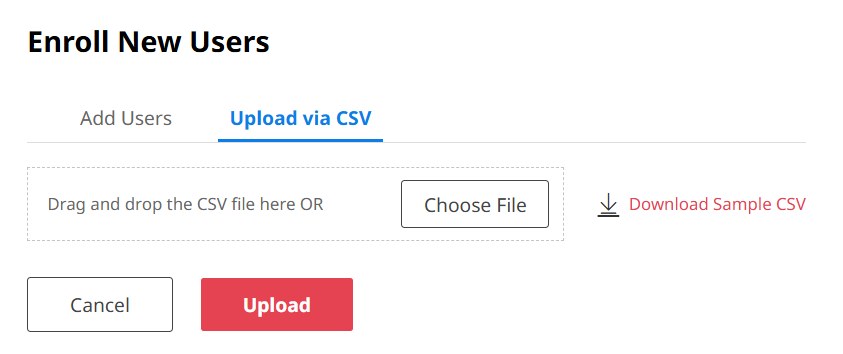
By email address — Enter one or more email addresses along with the users’ first and last names. Existing users are enrolled immediately, while new users receive an invitation to register and join.

CSV upload — Upload a spreadsheet of email addresses to bulk-enroll multiple users at once (if enabled by your site admin). A sample file is available by clicking “Download Sample CSV.”
Each enrolled member uses one seat. The dashboard shows how many seats remain.
Step 9: Use Group Codes for self-enrollment
Group Codes allow members to sign themselves up without you manually adding each user.
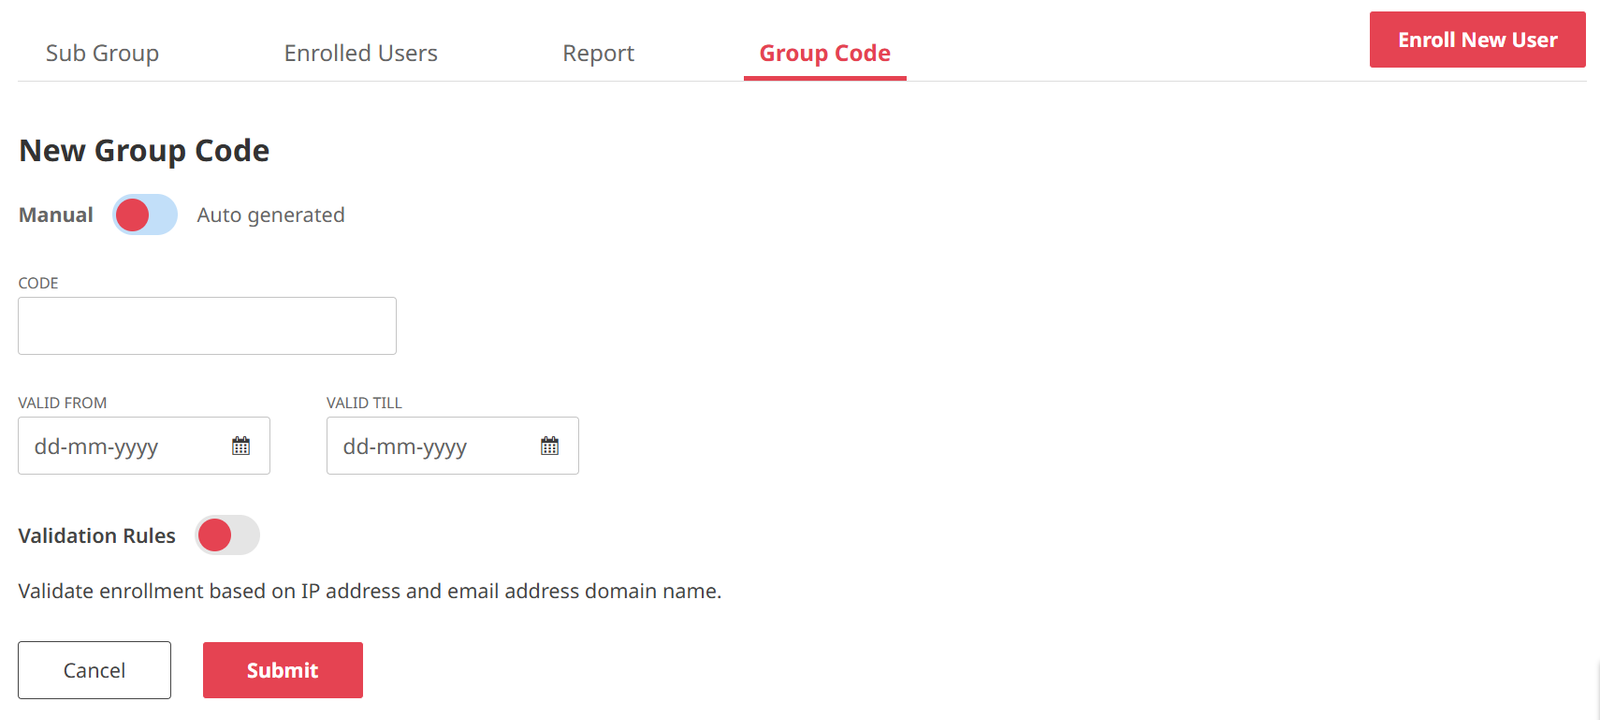
To create a Group Code:
- Go to the Group Code tab in your dashboard.
- Click Create New Group Code.
- Enter a custom code, or click Auto Generate to create a random unique code.
- Set a From and To date (required) so the code expires automatically.
- Optionally, add Validation Rules — for example, restrict usage to a specific IP address or company email domain (e.g., yourcompany.com).
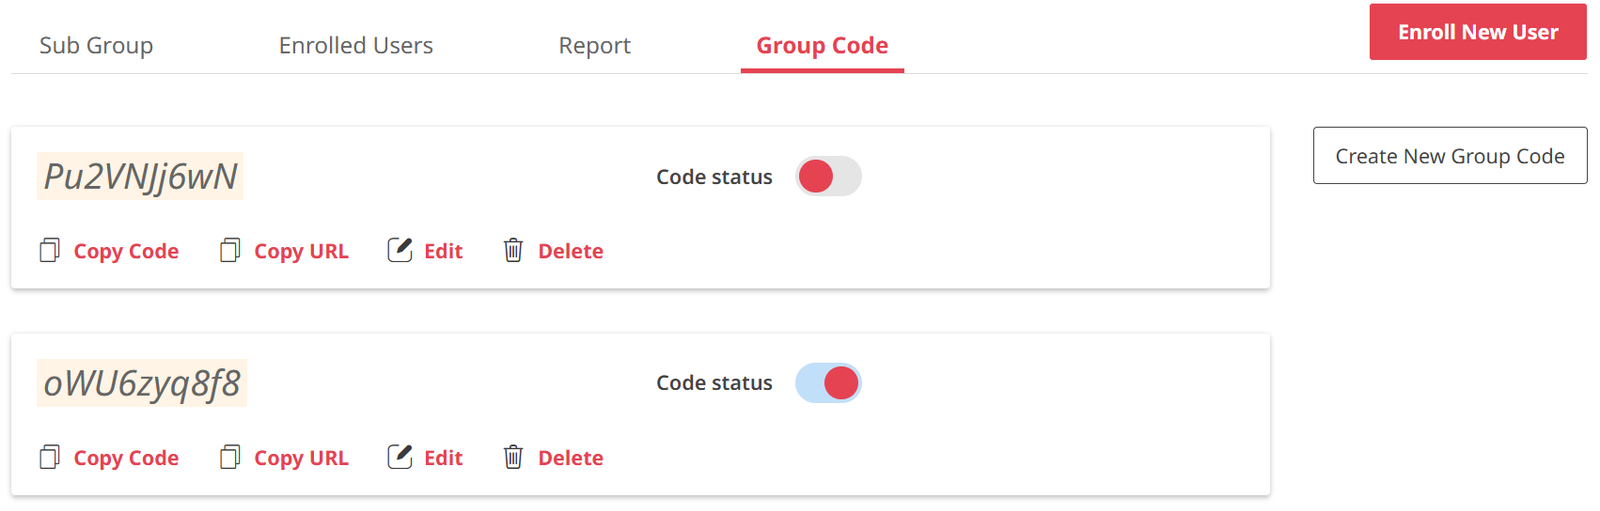
- Make sure the Code Status is set to ON by toggling the button to the right, then save.
To share the code:
- Click Copy Code and provide it to members to enter on the Group Code Registration page.
- Or click Copy URL, which includes the registration page link with the code already pre-filled in the form — this is the easiest option to share with your team.
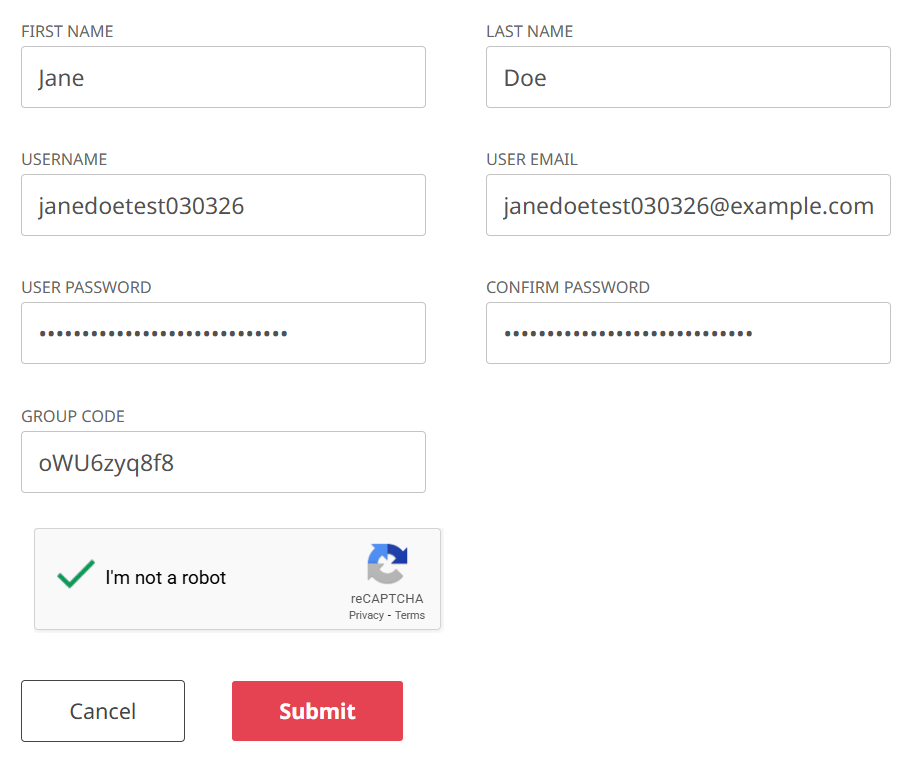
When members visit the page and register using the code, they are automatically added to your group.
Step 10: Track learner progress
In the Reports tab, you can view learner progress reports by course.
- Select a course from the dropdown menu.
- View reports for learners in the selected group.
- Reports may include:
- Course progress
- Quiz statistics
- Certificates earned
Step 11: Remove a member
In the Enrolled Users tab, click the Remove icon next to the user you want to remove and confirm.
This action frees up the seat for a new enrollee. Removing a member does not issue a refund — it simply makes the seat available again. The removed user will lose access to the group’s courses.
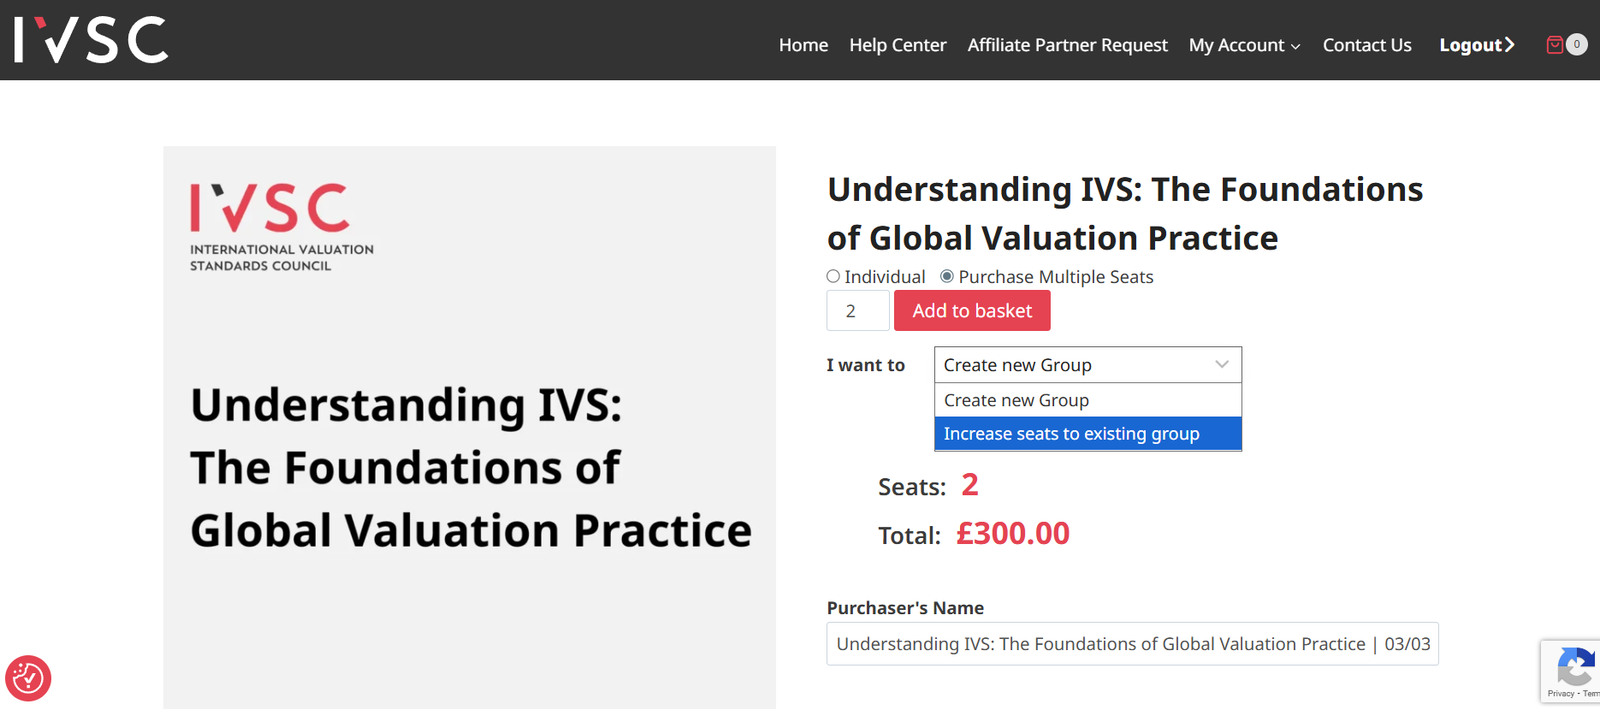
Step 12: Return to the product page Go back to the same course product page you originally purchased. Because you’re a returning Group Leader, the page will recognize your account and show a dropdown menu with additional options instead of the standard purchase form.
Step 13: Choose an option from the dropdown The dropdown offers three choices:
- Increase Seats to Existing Group — adds more seats to your existing group. Price is calculated as the original per-seat price multiplied by the number of new seats.
- Create New Group — starts a fresh group under the same product, useful if you manage multiple teams or departments separately.
Step 14: Complete checkout Proceed through checkout as normal. Once the order is marked Completed, your group’s seat count in the dashboard updates automatically — no extra steps required.